Published on October 22, 2025 at 9:00 AMUpdated on October 22, 2025 at 9:00 AM
Wall-mounting a television is arguably one of the most effective ways to grant any space a clean, contemporary upgrade while simultaneously optimizing room layout and aesthetics. Beyond the undeniable stylish appeal, professional mounting significantly enhances the viewing experience by allowing the user to precisely position the screen at the ideal ergonomic height and angle. However, achieving successful, secure wall-mounting requires meticulous preparation; it is a process that demands much more than simply hoisting a display onto a bracket. It necessitates choosing the correct mount for the display and the wall, accurately locating and utilizing solid structural support, and ensuring pinpoint alignment. With careful planning and the application of the right tools and techniques, the project of mounting your TV on the wall can completely transform your living room setup into a sleek, professional, and permanently reliable display.
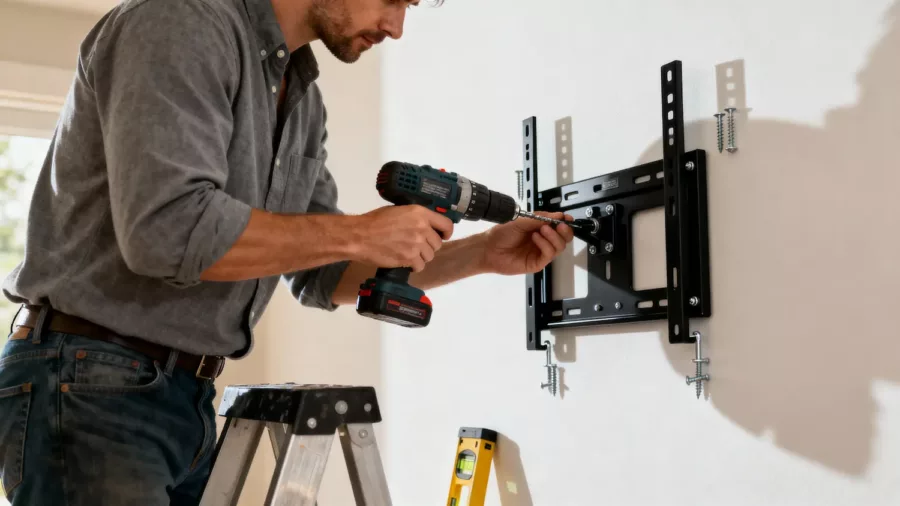
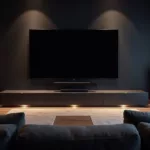
Wall-mounting a TV is a smart way to improve your room’s look and save space.(Image: ABWavesTech)
This detailed guide breaks down the process into essential, sequential steps, ensuring both safety and the optimal aesthetic outcome for mounting your TV on the wall.
The groundwork for a smooth and secure installation begins long before any drilling starts. Before mounting your TV on the wall, it is key to thoroughly assess your viewing space and the technical compatibility of the television and the wall structure. This is the crucial safety and ergonomic check.
A. Ergonomic and Aesthetic Fit
Wall Dimensions and TV Size: Begin by measuring the specific area of the wall where the TV will be mounted. Ensure the physical size of the TV fits well within the allocated space, allowing sufficient surrounding visual space so the TV doesn’t look overpowering or awkwardly crammed.
Viewing Distance: The viewing distance is paramount for the best experience. The TV should be sized appropriately for how far your primary seating area is from the wall. Mounting too large a screen for a short distance, or vice versa, will compromise comfort and immersion.
Viewing Height: Determine the ideal vertical placement. Generally, the center of the screen should be at or slightly below eye level when you are seated. Mark this ideal center point on the wall; this will dictate the final placement of the mount.
B. Structural and Technical Compatibility
Wall Load-Bearing Capacity: Verify that the wall itself can hold the TV’s weight, plus the weight of the mount, with a significant margin of safety. Drywall alone is insufficient; the mount must anchor into structural elements.
TV’s VESA Mounting Pattern: Every modern TV adheres to the VESA (Video Electronics Standards Association) mounting standard. This is the distance, in millimeters, between the four screw holes on the back of your TV (e.g., 400x400mm). This pattern must precisely match the compatibility of the wall mount you purchase.
Weight Limit: Check the maximum weight capacity of the mount and ensure it significantly exceeds the actual weight of your television. A professional often aims for a mount rated to hold at least twice the weight of the TV.
Taking these preparatory steps guarantees that the installation of your TV on the wall is not only safe but also perfectly suited to your space and viewing needs.
2. Selecting the Appropriate Wall Mount
Choosing the right wall mount is fundamental for a safe, functional, and ergonomically correct TV setup. The mount dictates the level of adjustability you will have once your TV on the wall is secured.
Types of Wall Mounts
There are three main categories, each offering different levels of adjustability:
Fixed (or Low-Profile) Mounts: These keep the TV closest to the wall, offering the sleekest, most modern look with minimal gap. They are ideal for situations where the viewing position is always directly in front of the screen. They offer no vertical or horizontal adjustment once installed.
Tilting Mounts: These allow the TV to tilt vertically (up or down) by a few degrees. This is essential if the TV is mounted above the ideal eye level (e.g., above a fireplace) to compensate for the upward viewing angle and reduce reflections.
Full-Motion (or Articulating) Mounts: These feature an arm that allows the TV to be pulled away from the wall, swiveled horizontally, and sometimes tilted vertically. They are ideal for complex room layouts, corner installations, or when you need to access the rear ports frequently. Note: Full-motion mounts require extremely robust wall anchoring due to the increased leverage and strain.
Picking the ideal wall mount, designed to support your TV’s specifications and match your required viewing flexibility, is the central decision that guarantees a secure installation and the best viewing angles for your entertainment experience.
3. Gathering Necessary Tools and Materials
Successful TV wall-mounting demands organization. Starting the process without the right items will inevitably lead to frustration, delays, and potentially dangerous shortcuts.
Essential Toolkit for Wall-Mounting
To make your TV wall-mounting experience smooth and professional, you will need:
The Compatible Wall Mount: Verified for VESA pattern and weight capacity.
Power Drill and Appropriate Bits: Necessary for drilling pilot holes into the wall studs.
Electronic Stud Finder: Absolutely essential for accurately locating wooden or metal wall studs (or masonry if applicable).
High-Quality Level: A long carpenter’s level (24 inches or more is best) to ensure the bracket is perfectly horizontal.
Measuring Tape: For accurate placement measurements.
Pencil: For marking placement points on the wall.
Screwdriver (Manual or Electric): For attaching the brackets to the back of the TV.
Mounting Hardware: Use the heavy-duty lag bolts provided with the mount for anchoring into studs. If mounting into concrete/brick, use specialized masonry anchors and a hammer drill.
Safety Glasses and Gloves: Always wear protective gear, especially when drilling.
By having all these tools ready and organized, your project to mount your TV on the wall will proceed safely, efficiently, and without any costly interruptions.
4. Locating Wall Studs and Measuring for Placement
This is the most critical step for stability. Using a stud finder is non-negotiable for finding strong wall studs that will securely hold your TV mount. Anchoring a heavy TV into mere drywall is dangerous and will inevitably fail.
Identifying and Marking Studs
Run the Stud Finder: Scan the area of the wall where the mount will be placed, moving the stud finder horizontally. Mark the center point of the studs found.
Verify Stud Center: Drill a tiny test hole to confirm you are hitting solid wood (or metal). The lag bolts used must penetrate the center of the stud for maximum strength. Mark a clean vertical line down the center of each required stud.
Determine Mount Placement: Align the wall-mounting template (often provided with the mount) or the mount itself with the determined center height (eye level) marked in Step 1. The goal is to ensure the mounting holes on the bracket line up perfectly over the center line of the identified studs.
Measuring for Final Alignment
Centering: Accurate measurements ensure your TV mount is centered horizontally with the viewing area and at the ideal height.
Leveling: Once the initial mounting holes are marked, use the long level to draw a perfectly horizontal line connecting the marked holes. Do not trust your eyes. The bracket must be level, or the final TV display will be noticeably crooked.
By clearly marking the load-bearing wall studs and precisely measuring, you make the TV mount installation process stable and professional, eliminating costly errors.
5. Attaching the Mount to the Wall and TV
This stage involves physically securing the two main components of the system: the wall bracket and the TV brackets.
A. Fastening the Wall Mount
Drill Pilot Holes: Following the marked and leveled line, drill pilot holes into the center of the wall studs. The size of the bit must match the recommendations for the lag bolts being used; the pilot hole should be slightly smaller than the bolt’s diameter to allow the threads to grip the wood securely.
Install the Wall Mount: Fasten the TV mount to the marked wall studs using the heavy-duty lag bolts and washers. Use a socket wrench or the appropriate drill setting to tighten the bolts. Tighten firmly but do not over-tighten to the point of stripping the stud. The mount should be stable, completely flush with the wall, and immovable. Use the level one last time to confirm it remains horizontal.
B. Attaching Brackets to the TV
Attach TV Brackets: Carefully place the TV face down on a soft, protected surface (like a blanket or the box). Attach the vertical mounting brackets to the TV’s designated VESA screw holes.
Select Proper Screws:Never use screws that are too long. Use only the screws that fit the depth of the holes and ensure they align perfectly with the mount’s bracket system. Secure all screws firmly, ensuring the brackets are stable and safely affixed to the TV back.
Properly attaching the TV mount to both the wall and the TV brackets guarantees a secure, reliable connection before the final lifting step.
6. Final Adjustments and Safety Checks
With the wall mount secure and the TV brackets attached, the final, most careful step is lifting and hanging the television, followed by crucial safety and aesthetic checks.
Lifting and Mounting: Carefully lift the TV (this is often a two-person job, especially for large screens) and hook the TV brackets onto the wall mount. Depending on the mount type, this may involve sliding, clicking, or locking the TV into place.
Secure the Safety Locks: Most mounts feature safety screws, clips, or locking mechanisms at the bottom of the TV brackets to prevent the TV from being accidentally knocked off the wall mount. This step is mandatory for safety.
Final Leveling and Adjustment: If using a tilting or full-motion mount, make any necessary final vertical angle adjustments. Use a level again on the top edge of the TV frame to confirm the screen itself is perfectly horizontal.
Cable Organization: Organizing cables safely is key to maintaining the clean look and functionality. Secure all cables (HDMI, power, etc.) neatly, using zip ties or cable routing channels hidden behind the TV or mount arm to avoid strain or damage. Ensure there is no strain on the ports.
Following these comprehensive steps guarantees your professional TV wall-mounting project is safe, secure, perfectly level, and ready to flawlessly enhance your home entertainment experience for years to come.